The method of adding Keyframe in ae
This article mainly introduces the method of adding keyframes to ae, which has a certain reference value, and interested friends can refer to it. I hope you will gain a lot after reading this article.
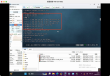
Ae method to add keyframes: first click on the composite, and import the material; then click the transform option, select the location of the video track, click the stopwatch icon; finally, move the timeline and adjust the zoom parameters.
How to add keyframes to ae:
1. Enter the interface of ae and click New Synthesis.
2. Import a picture of material, which can also be text.
3. Click the small triangle icon at the bottom of the picture material, and click the transform option.
4. Under the transformation option, you can see the icon with a small stopwatch in front of you, which can also be said to be the switch to add keyframes, select the location of the video track, and click the stopwatch icon (here take the zoom option as an example).
5. In this way, a small diamond icon appears on the video track, and this is the key frame.

6. Move the timeline, and then adjust the zoom parameters, and a Keyframe will be added automatically.
7. Keyframes can be added infinitely, as long as a certain effect is achieved.
Thank you for reading this article carefully. I hope the article "how to add keyframes to ae" shared by the editor will be helpful to you. At the same time, I also hope you will support us and pay attention to the industry information channel. More related knowledge is waiting for you to learn!